Here’s how to install custom brushes in Adobe Illustrator! In these examples, I am using version CC 2022,
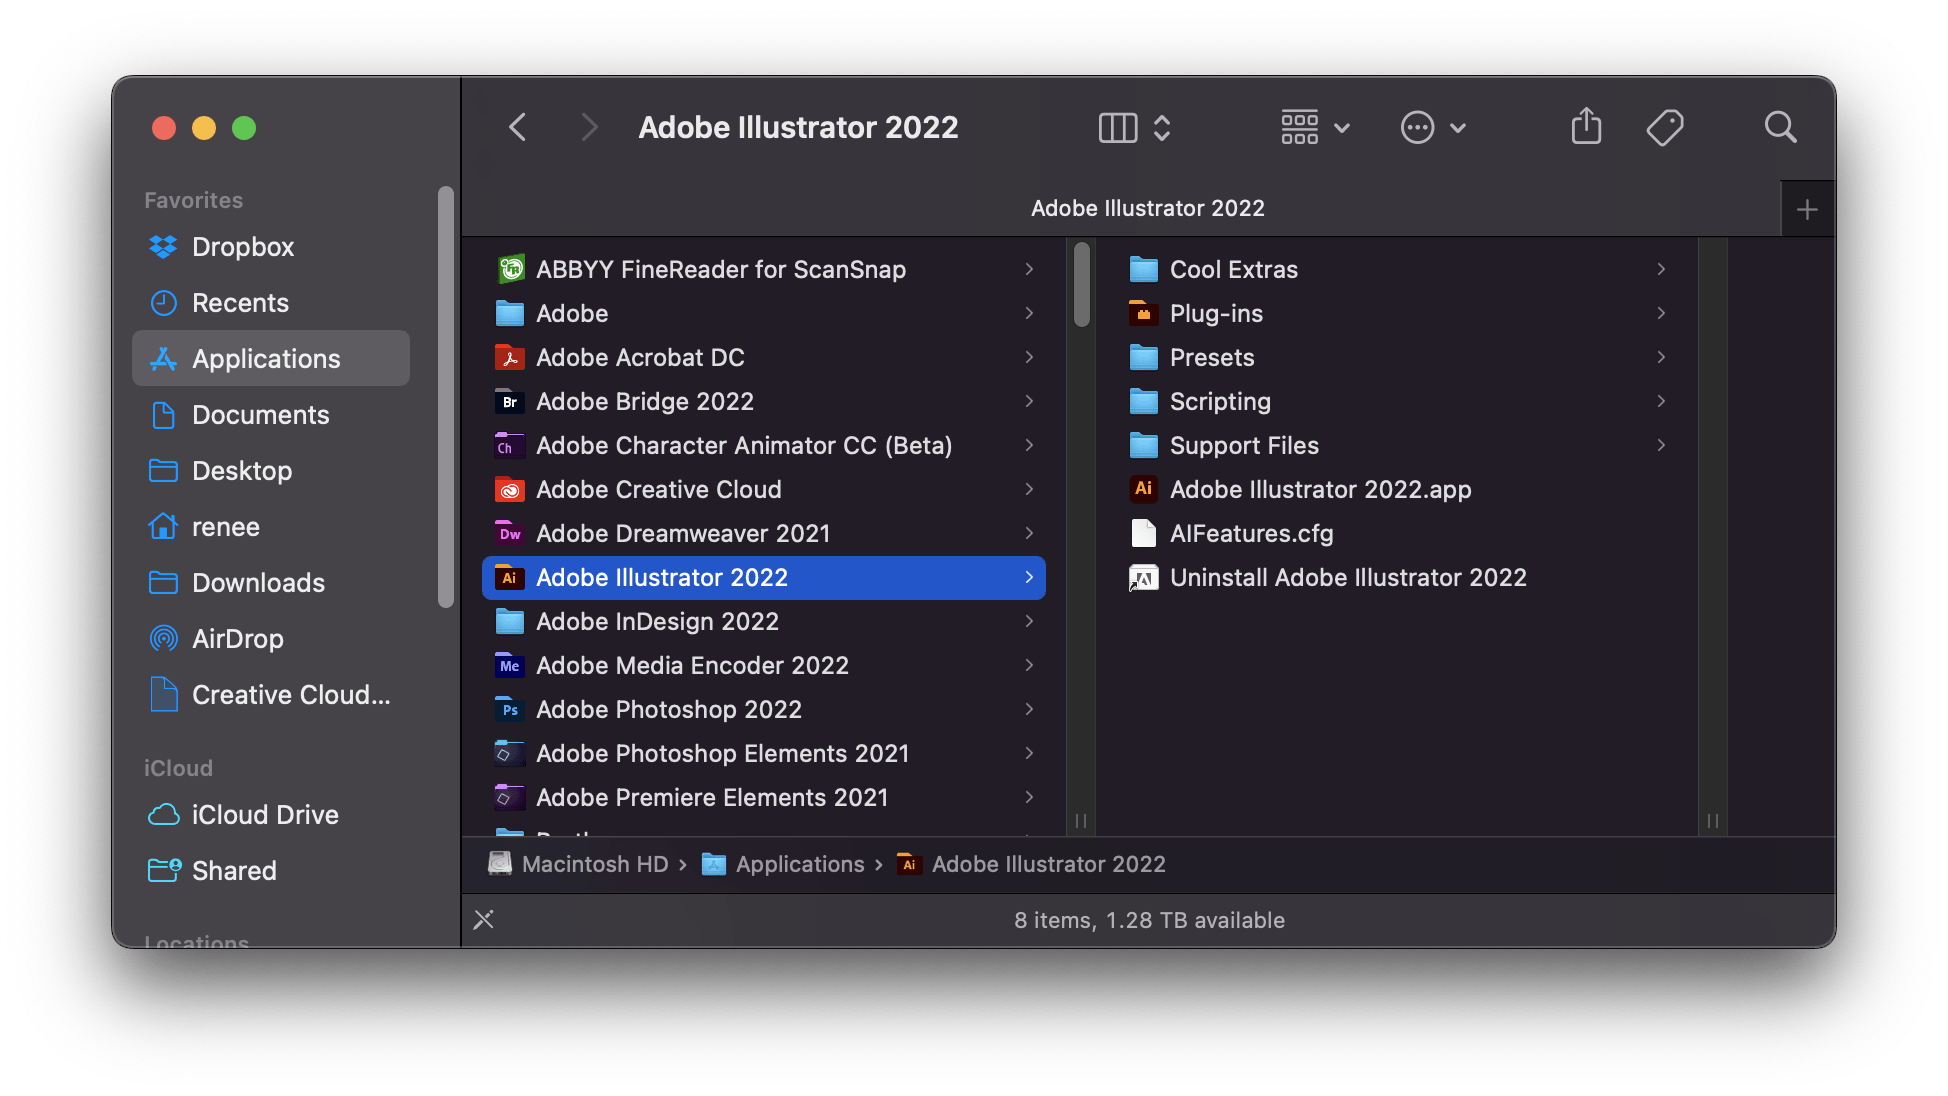
On your desktop finder, locate your Applications folder. Open the folder for the version of Adobe Illustrator in which you are working.
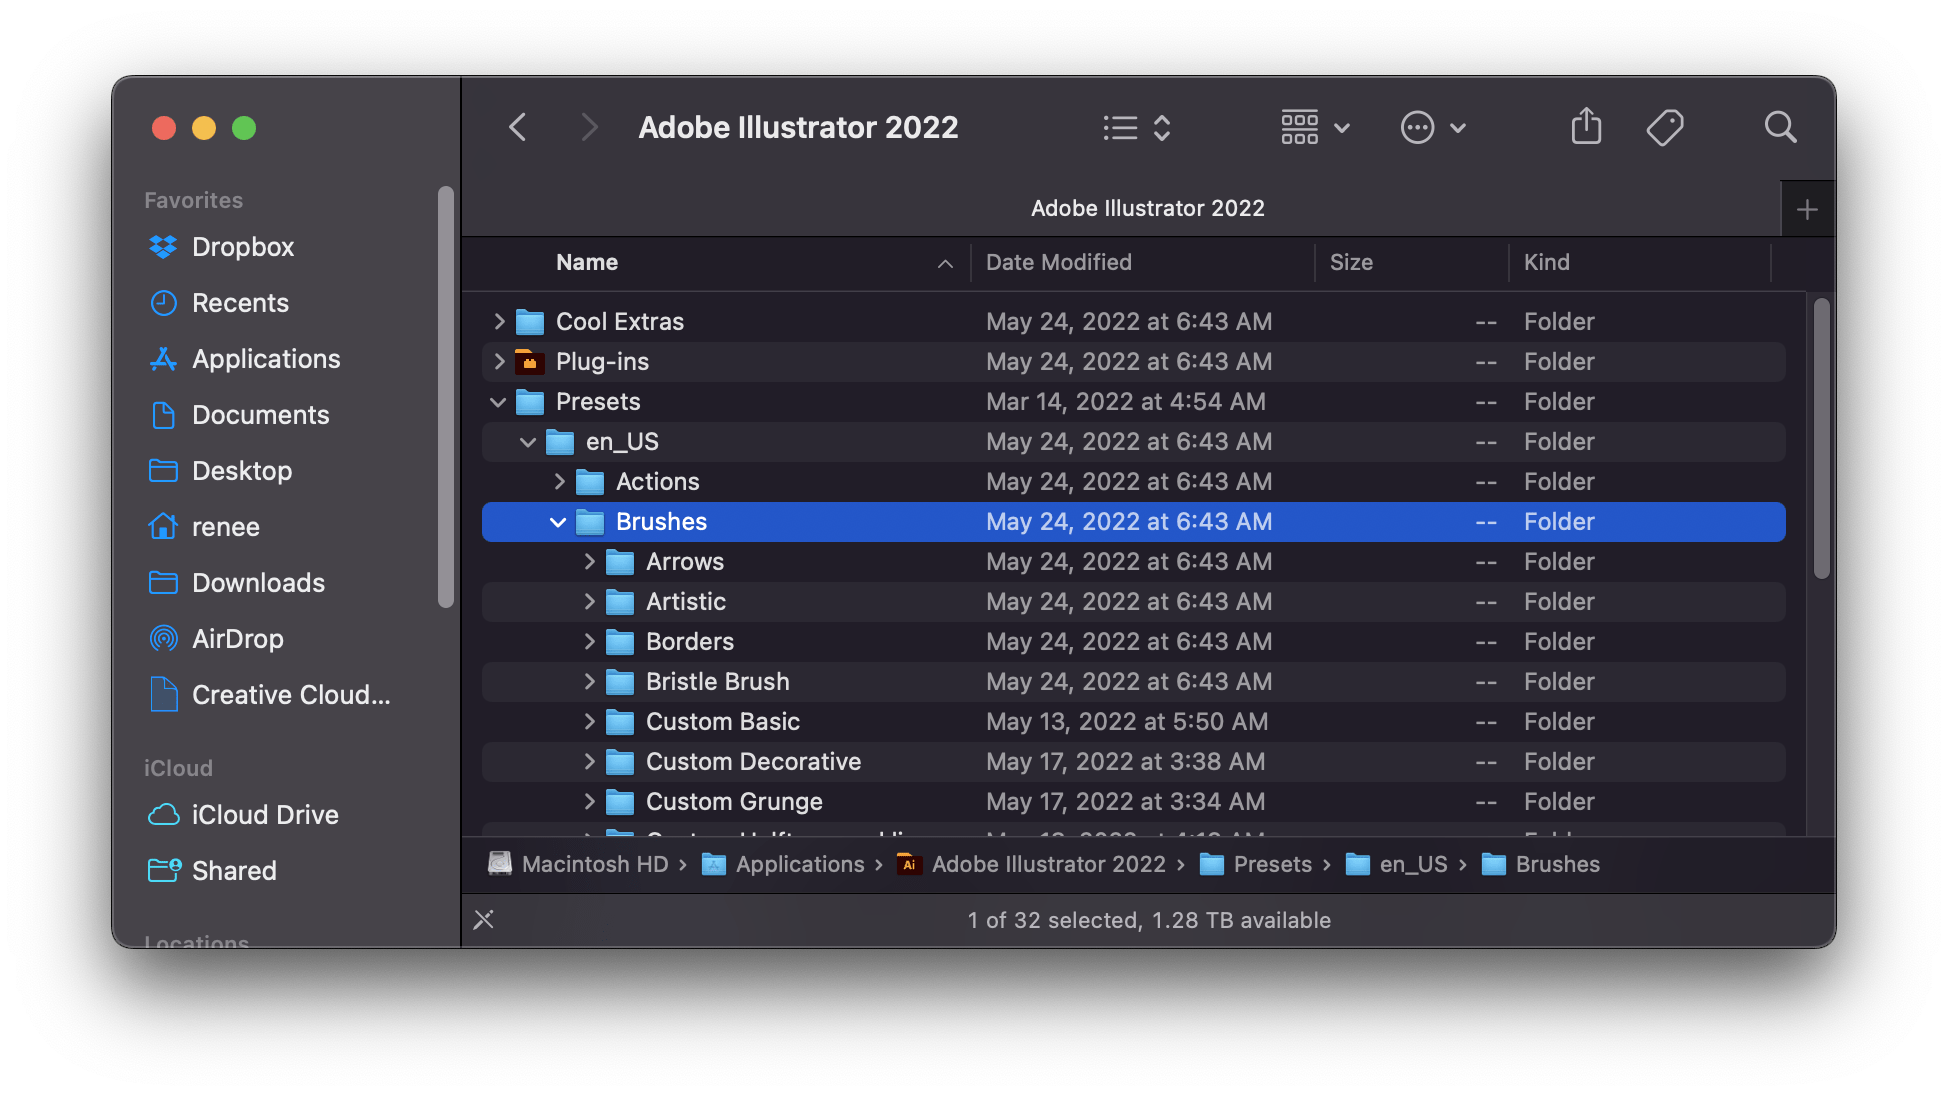
Open the Presets folder, the en_US folder, and then Brushes folder.
Create a new folder within the Brushes. You can create multiple folders if you need to keep brush sets separate or put all your custom brushes in one custom folder.

Move your custom .ai brush files into your new folder. (make sure you are using brush files that correspond to your version of Illustrator)

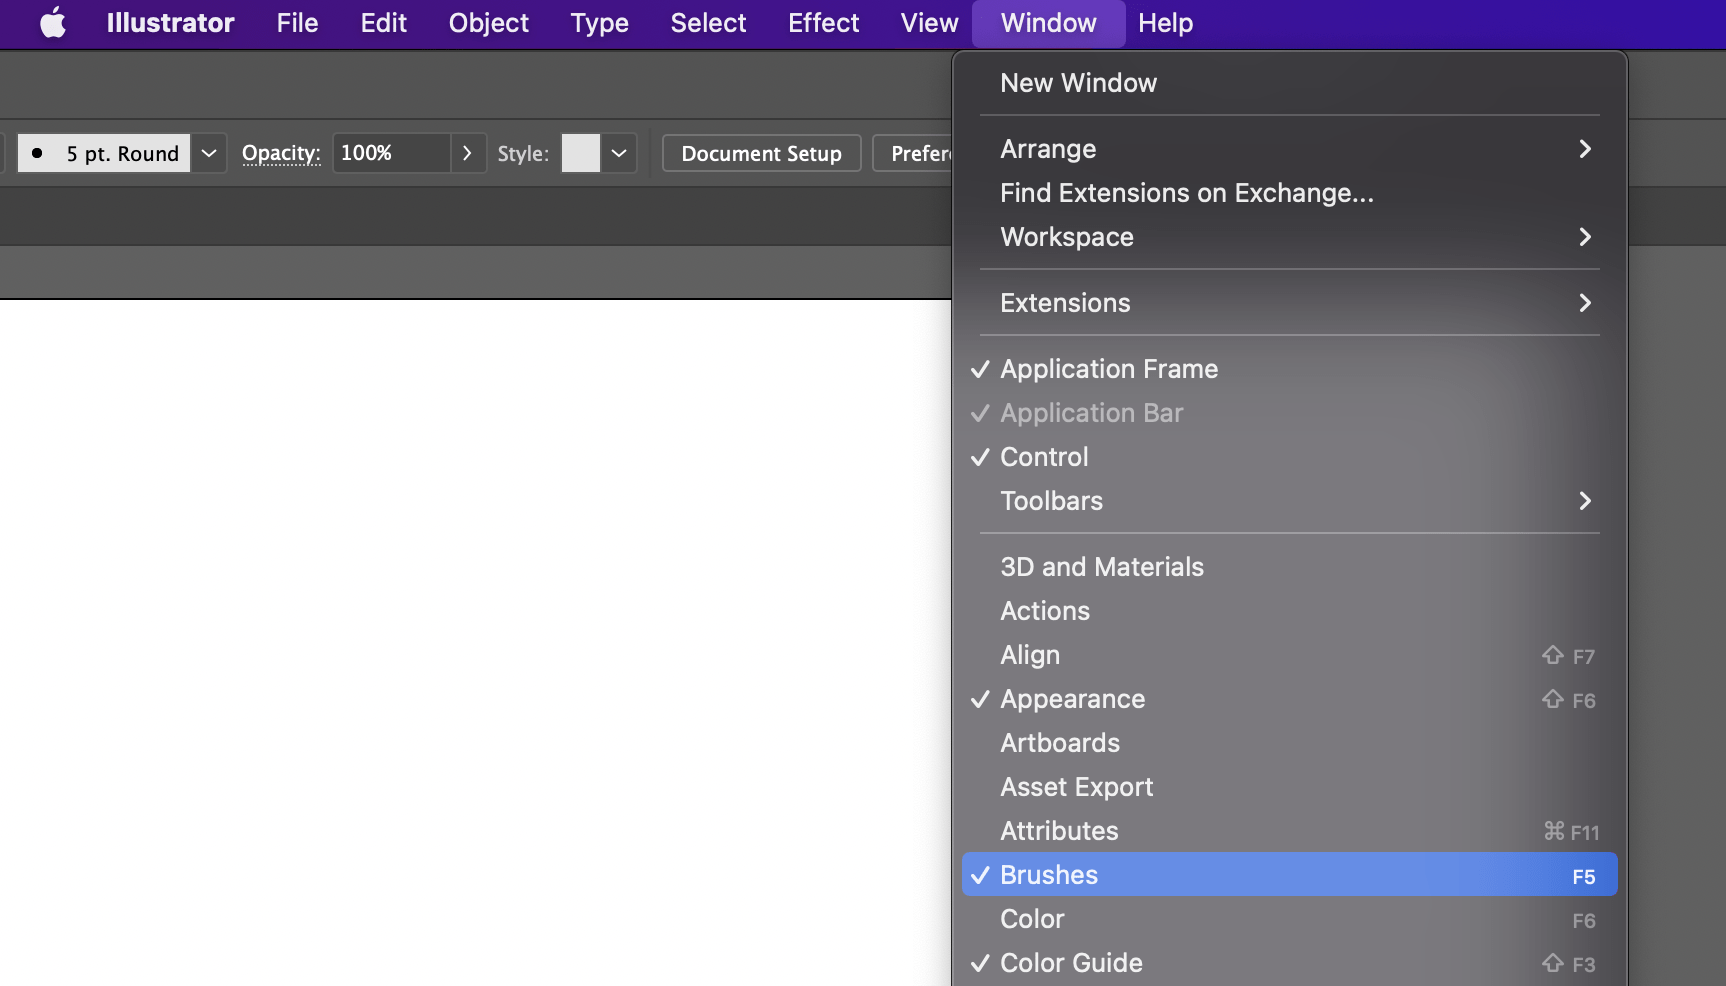
Your brushes will now be accessible every time you open Illustrator. To locate them, open the Brush Panel by going to Window> Brushes.
Click the Brush Libraries Menu at the bottom left corner of the panel.
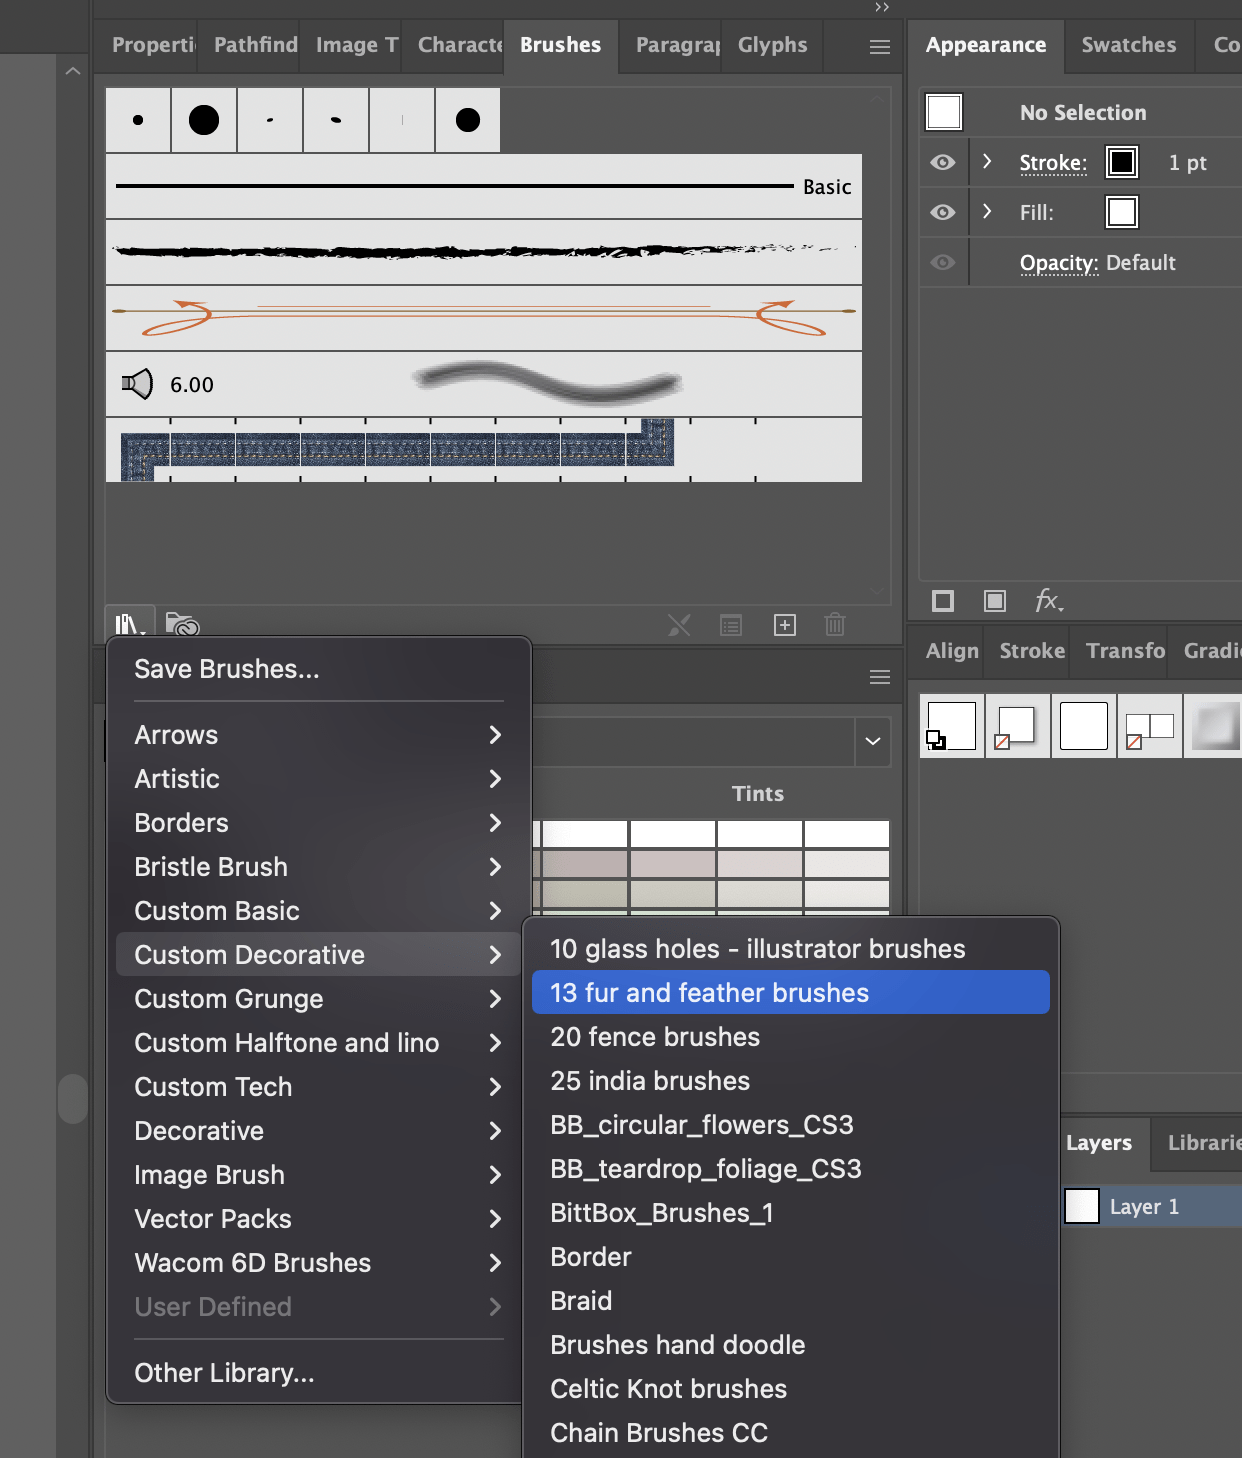
Expand your custom folder and you will find your newly installed brushes, ready to open.